Online Consult Information Collection
Just as an X-Ray can be analyzed by a radiographer or your GP doctor to find the best treatment option for you, with homeopathy your face can be analyzed to help identify which homeopathic natural medicine may help you. Clients that come to the clinic for their appointment will have their photos taken as part of the consult.
If you are taking your own photos please pay close attention to detail because the better the photos are, the more accurate analysis Louis can do to select the right natural medicine for you. Below is a description of the 9 photos Louis will require, and there is a form at the very bottom of the page you can use to submit your photos before your consultation.
There is also a Proforma to fill in which you can download from here which can also be submitted at the bottom of this page, along with your photos
NOTE: Camera phones are fine to use, however you must make sure you take the photo at least 1 meter away. If the image looks too small simply zoom in, but maintain the 1 meter distance otherwise the image will become distorted and unable to do an accurate analysis with. Also all photos are taken with the flash on except Photo #4, Photo #8 and Photo #9 (Flash or no flash included with each photo's heading)
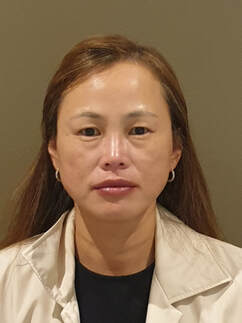
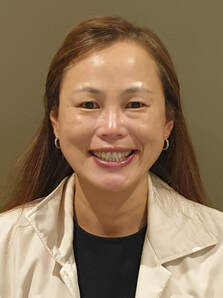
Photo #1 Straight on -No Smile (With Flash)
|
Photo one is taken straight on without a smile, being careful that the camera is directly infront so that the photo is not taken with a downward or upward angle, and that you can see evenly both ears to ensure the head is not rotated to the left or right. Make sure that the person in the photo is holding their head up straight and high so that it does not tilt to either side, forward or back.
TIP: Putting your palm on the top of their head and telling them to push up against it with their head can help the person in the photo to keep their head level. |
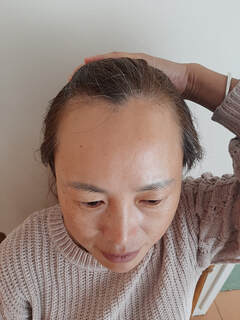
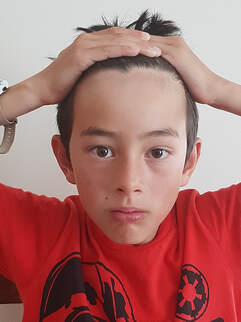
Photo #2 Straight on hair pulled back -No Smile (With Flash)
|
|
Photo two is similar to photo 1 except the hair is pulled back. Please make sure the head is straight as with picture 1, however because we will be using this picture to check the hairline, it is ok to tilt the head forward a little so that the hairline is clearly visible in the photo.
TIP: Try to hold back all of your hair but make sure your hands are far enough back so that the front of your hairline is clearly visible. |
Photo #3 Straight on -With BIG smile (With Flash)
|
Photo three also needs to be straight and centered as with picture one, however this time with a big smile that shows the teeth
|
Photo #4 Straight on -With BIG smile (No Flash)
|
Photo 4 is exactly the same as photo 3 except with the no flash setting on the camera.
|
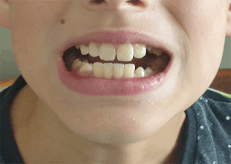
Photo #5 Growl (With Flash)
|
In photo five we are checking the teeth, so please make sure the teeth are clearly visible. If you find it hard to show your teeth you can use your fingers to pull your lips back a little so that your teeth are more visible.
|
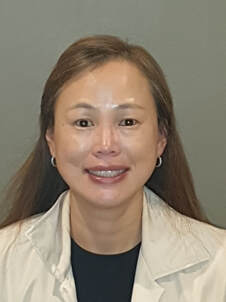
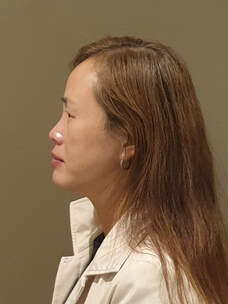
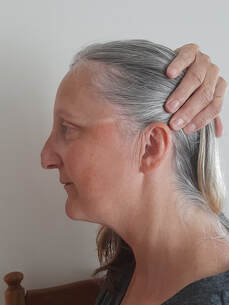
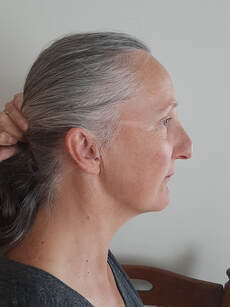
Photo #6 Left side (With Flash)
|
|
In Photo 6 the hair needs to be tied back so that the persons forehead and ears are clearly visible. If the person has a fringe, they need to hold the fringe back so their forehead is visible while at the same time holding their elbow back so that the forehead is clearly contrasting with the background and not with the persons arm. The person taking the photo should pay special attention to the eyebrows / eyelashes of the far eye. The person in the photo can rotate their head to the left so that their far eye just becomes visible, then they can rotate their head back to the right slightly so that the eyelashes / eybrow just goes out of sight and the head should now be directly side-on.
TIP: Make sure that the clients head is not tilted either side and that the camera is at the same height of the middle of the head so that the image is centered correctly and straight. |
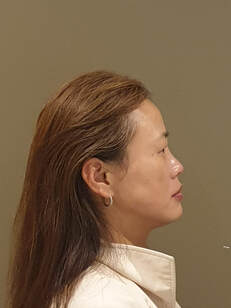
Photo #7 Right side (With Flash)
|
|
Photo 7 is the same as photo 6, except taken from the right side rather than the left. Follow the same directions as above but for the right side.
|
Photo #8 Eyebrows together (No Flash)
|
In photo eight the person in the photo should try to squeeze their eyebrows together.
|
Photo #9 Eyebrows raised (No Flash)
|
In Photo nine the person in the photo should raise their eyebrows as high as they can
|
Photo Submission
Your photos and completed proforma can be submitted on the form below. You can download a blank copy of the proforma from here.